
Adding a new page to Fable Elmish, Part 2
Creating a new page
A variation on the previous post. This time, we’ll be adding a dynamic page.
Run the following commands from your terminal or console to create a new project.
dotnet new fable-elmish-react -n NewComplexPageElmish
cd NewComplexPageElmish
yarn
dotnet restore
We will reuse the Counter page to simplify the steps. Go inside the “src” folder of your project and make a copy of the “Counter” folder. Named the copy “NewCounter”. There are 3 files inside the folder: State.fs, Types.fs, and View.fs. Now to change the domain of the files. Open all 3 of them and edit the top line where it said module Counter.View or module Counter.State and change it to module NewCounter.View or module NewCounter.State respectively. This changes the domain of the file from Counter to NewCounter
Now to add the files to the project. Open the NewComplexPageElmish.fsproj file in the root of your project and modify the file to look like the following.
<Project Sdk="FSharp.NET.Sdk;Microsoft.NET.Sdk">
  <PropertyGroup>
    <TargetFramework>netstandard1.6</TargetFramework>
  </PropertyGroup>
  <ItemGroup>
    <!-- Global to the app -->
    <Compile Include="src/Global.fs" />
    <!-- Info -->
    <Compile Include="src/Info/View.fs" />
    <!-- Counter -->
    <Compile Include="src/Counter/Types.fs" />
    <Compile Include="src/Counter/State.fs" />
    <Compile Include="src/Counter/View.fs" />
    <!-- NewCounter -->
    <Compile Include="src/NewCounter/Types.fs" />
    <Compile Include="src/NewCounter/State.fs" />
    <Compile Include="src/NewCounter/View.fs" />
    <!-- Home -->
    <Compile Include="src/Home/Types.fs" />
    <Compile Include="src/Home/State.fs" />
    <Compile Include="src/Home/View.fs" />
    <!-- Navbar -->
    <Compile Include="src/Navbar/View.fs" />
    <!-- App -->
    <Compile Include="src/Types.fs" />
    <Compile Include="src/State.fs" />
    <Compile Include="src/App.fs" />
  </ItemGroup>
  <ItemGroup>
    <PackageReference Include="FSharp.NET.Sdk" Version="1.0.*" PrivateAssets="All" />
    <DotNetCliToolReference Include="dotnet-fable" Version="1.0.8" />
  </ItemGroup>
  <Import Project=".paket\Paket.Restore.targets" />
</Project>
This will tell the project to compile the newly added files.
As a reminder, the .fsproj file show the compile order of the files. Where you place the the code affect the compilation. For the code above, “src/Global.fs” will be compiled before “src/App.fs”
Now let’s change the page slightly so we can tell the difference. Modify the following in View.fs
let root model dispatch =
  div
    [ ClassName "columns is-vcentered" ]
    [ div [ ClassName "column" ] [ ]
      div
        [ ClassName "column is-narrow"
          Style
            [ CSSProp.Width "170px" ] ]
        [ str (sprintf "Counter value: %i" model) ]
      simpleButton "+1" Increment dispatch
      simpleButton "-1" Decrement dispatch
      simpleButton "Reset" Reset dispatch
      div [ ClassName "column" ] [ ] ]
to
let root model dispatch =
  div
    [ ClassName "columns is-vcentered" ]
    [ div [ ClassName "column" ] [ ]
      div
        [ ClassName "column is-narrow"
          Style
            [ CSSProp.Width "170px" ] ]
        [ str (sprintf "Our New Counter value: %i" model) ]
      simpleButton "+1" Increment dispatch
      simpleButton "-1" Decrement dispatch
      simpleButton "Reset" Reset dispatch
      div [ ClassName "column" ] [ ] ]
This changes the page to display “Our New Counter value: “ instead of “Counter value: “ in the original Counter page.
Adding the new Page, Model, and Message
Same as the previous blog post, we need to change the Page discriminated union to include our new page. Then we modify the toHash function to give an url for the new page. Open up “src/Global.fs” and modify the following
type Page =
  | Home
  | Counter
  | About

let toHash page =
  match page with
  | About -> "#about"
  | Counter -> "#counter"
  | Home -> "#home"
to this
type Page =
  | Home
  | Counter
  | About
  | NewCounter

let toHash page =
  match page with
  | About -> "#about"
  | Counter -> "#counter"
  | Home -> "#home"
  | NewCounter -> "#newcounter"
In the previous post, we added a page with no functionality. To have the page do something in the Elm architecture, and therefore Elmish, we need to use Message and Model. Messages are the the command telling the site what functions to run. We can have different types of Messages to run different functions. Models are objects that contain the data that the page can use to either display or perform functions on.
Since our new page have the same functionality of the Counter page. We can reuse the Message and Model from it. However, when we copy the files, we created a new Message and Model so let’s use them. To use the new Message and Model, modify “src/Types.fs” from
type Msg =
  | CounterMsg of Counter.Types.Msg
  | HomeMsg of Home.Types.Msg

type Model = {
    currentPage: Page
    counter: Counter.Types.Model
    home: Home.Types.Model
  }
to
type Msg =
  | CounterMsg of Counter.Types.Msg
  | HomeMsg of Home.Types.Msg
  | NewCounterMsg of NewCounter.Types.Msg

type Model = {
    currentPage: Page
    counter: Counter.Types.Model
    home: Home.Types.Model
    newCounter: NewCounter.Types.Model
  }
Both the Message and Model that we are using is in the “src/NewCounter/Types.fs” and I recommend taking a look at it to get an idea of their purpose.
Adding a Link to your new Page
Now to add your link to the side menu so we can access the page. Open up “src/App.fs” and edit
let menu currentPage =
  aside
    [ ClassName "menu" ]
    [ p
        [ ClassName "menu-label" ]
        [ str "General" ]
      ul
        [ ClassName "menu-list" ]
        [ menuItem "Home" Home currentPage
          menuItem "Counter sample" Counter currentPage
          menuItem "About" Page.About currentPage ] ]
so that it look like this
let menu currentPage =
  aside
    [ ClassName "menu" ]
    [ p
        [ ClassName "menu-label" ]
        [ str "General" ]
      ul
        [ ClassName "menu-list" ]
        [ menuItem "Home" Home currentPage
          menuItem "Counter sample" Counter currentPage
          menuItem "About" Page.About currentPage
          menuItem "Our New Page" Page.NewCounter currentPage ] ]
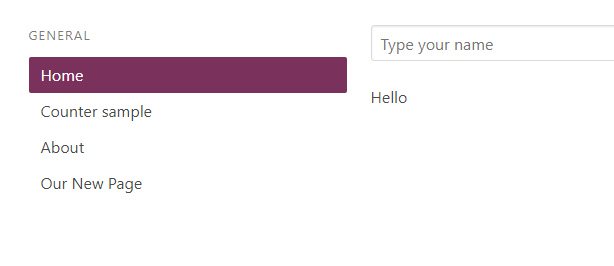
If you run the project you should see the new link on the side menu. I included a picture of what it looks like. It is easy to duplicate the closing “]]” so be careful.
Creating Page Handlers
Now to make the supporting code to handle the page change. Edit the root function in “src/App.fs” so that
let root model dispatch =

  let pageHtml =
    function
    | Page.About -> Info.View.root
    | Counter -> Counter.View.root model.counter (CounterMsg >> dispatch)
    | Home -> Home.View.root model.home (HomeMsg >> dispatch)
looks like
let root model dispatch =

  let pageHtml =
    function
    | Page.About -> Info.View.root
    | Counter -> Counter.View.root model.counter (CounterMsg >> dispatch)
    | Home -> Home.View.root model.home (HomeMsg >> dispatch)
    | NewCounter -> NewCounter.View.root model.newCounter (NewCounterMsg >> dispatch)
This code detects the the new Page and call the right root function. In the previous blog post, the root function of the static page require no parameter. This time, we also need to pass the Model and Message since the page is dynamic.
Now to help the application get the right page when navigating to an URL. Edit “src/State.fs” from
let pageParser: Parser<Page->Page,Page> =
  oneOf [
    map About (s "about")
    map Counter (s "counter")
    map Home (s "home")
  ]
to
let pageParser: Parser<Page->Page,Page> =
  oneOf [
    map About (s "about")
    map Counter (s "counter")
    map Home (s "home")
    map NewCounter (s "newcounter")
  ]
Now the application can load the right page. Note that “newcounter” come from the toHash function in “src/Global.fs”
let toHash page =
  match page with
  | About -> "#about"
  | Counter -> "#counter"
  | Home -> "#home"
  | NewCounter -> "#newcounter"
Since we use “#newcounter” here, we use “newcounter” inside the pageParser function.
Creating the Application’s Models and Commands
Elmish keep track of all the models and commands in the application. Command is a container for messages. A possible command is Cmd<NewCounterMsg(Increment)>. You can find out how Elmish use rely on commands here.
The models are kept as a single record with a unique field for each possible model. Commands are kept as a sequence with all commands to be run. Let’s modify the application to keep track of our new model and commands. While still in “src/State.fs” edit
let init result =
  let (counter, counterCmd) = Counter.State.init()
  let (home, homeCmd) = Home.State.init()
  let (model, cmd) =
    urlUpdate result
      { currentPage = Home
        counter = counter
        home = home }
  model, Cmd.batch [ cmd
                     Cmd.map CounterMsg counterCmd
                     Cmd.map HomeMsg homeCmd ]
to
let init result =
  let (counter, counterCmd) = Counter.State.init()
  let (newCounterModel, newCounterCmd) = NewCounter.State.init()
  let (home, homeCmd) = Home.State.init()
  let (model, cmd) =
    urlUpdate result
      { currentPage = Home
        counter = counter
        home = home
        newCounter = newCounterModel }
  model, Cmd.batch [ cmd
                     Cmd.map CounterMsg counterCmd
                     Cmd.map HomeMsg homeCmd
                     Cmd.map NewCounterMsg newCounterCmd ]
Now the application will create a new record and list of the models and commands on startup. The models are set to the result of the init function for the respective page.
Looking deeper at the changes. There are three changes here. First is let (newCounterModel, newCounterCmd) = NewCounter.State.init() which call NewCounter.State.init() and store the result inside the values, newCounterModel and newCounterCmd.
To understand newCounter = newCounterModel part, look at the surrounding code
{ currentPage = Home
  counter = counter
  home = home
  newCounter = newCounterModel }
It is creating a record of all the possible models. It uses the newCounterModel as the initial state for the newCounter field in the record.
The last code portion, Cmd.map NewCounterMsg newCounterCmd create a Command out of your message and command and is added to the sequence of commands for the application.
Confusing? Another way to look at this is to pay attention to the type. NewCounterMsg is a message that can be
Increment,Decrement, orResetand newCounterCmd isCmd<NewCounter.Types.Msg>. IfNewCounterMsgisIncrement, thenCmd.mapreturn aCmd<Increment>.
Update the Application’s Models and Commands
Finally, the application need to keep the record of models and the list of commands updated. While still in “src/State.fs”, change the following
let update msg model =
  match msg with
  | CounterMsg msg ->
      let (counter, counterCmd) = Counter.State.update msg model.counter
      { model with counter = counter }, Cmd.map CounterMsg counterCmd
  | HomeMsg msg ->
      let (home, homeCmd) = Home.State.update msg model.home
      { model with home = home }, Cmd.map HomeMsg homeCmd
to
let update msg model =
  match msg with
  | CounterMsg msg ->
      let (counter, counterCmd) = Counter.State.update msg model.counter
      { model with counter = counter }, Cmd.map CounterMsg counterCmd
  | HomeMsg msg ->
      let (home, homeCmd) = Home.State.update msg model.home
      { model with home = home }, Cmd.map HomeMsg homeCmd
  | NewCounterMsg msg ->
      let (newCounterModel, newCounterCmd) = NewCounter.State.update msg model.newCounter
      { model with newCounter = newCounterModel }, Cmd.map NewCounterMsg newCounterCmd
Going through line by line, | NewCounterMsg msg -> add a new union case to our pattern match. Basicly telling the function if it get a NewCounterMsg msg run the following code.
The next line, let (newCounterModel, newCounterCmd) = NewCounter.State.update msg model.newCounter, create two values newCounterModel and newCounterCmd from the result of the function. This is our updated model and commands.
Finally, { model with newCounter = newCounterModel }, Cmd.map NewCounterMsg newCounterCmd is a tuple containing a clone of model record with the new newCounter and a new command. This is returned as the updated model and command for the application.
Running your Program
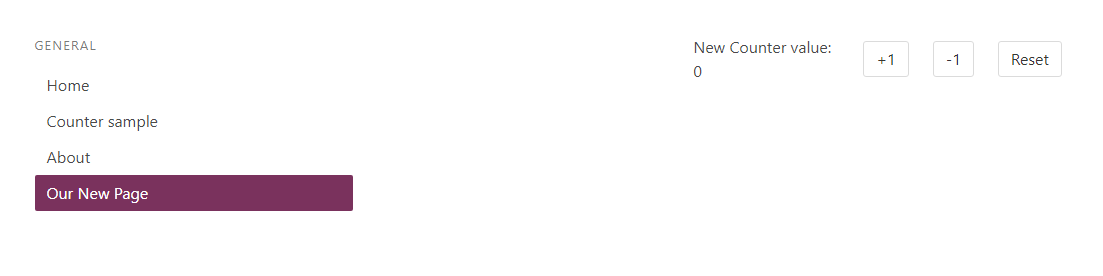
Now run dotnet fable npm-run start and go to http://localhost:8080/ and click on the link on the side to see your new page.
The final code can be found here.